
ARTICLE SUMMARY
This article outlines how to archive existing OneDrive files.
Please note: the following steps are required for any existing contents that pre-dated the connector (in this case R365 Connector for OneDrive for Business) as once the relevant Connector has been set up and enabled, any new documents created in SharePoint Online or OneDrive for Business, and any modifications to existing documents, will be managed by Records365.
The Content Registration process provides a tailored method of locating documents and folders in SharePoint Online or OneDrive for Business and passing them to their respective Connector for submission to Records365.
More details in the link below:
https://docs.records365.com/connectors/administration/sharepoint-online/content-registration/
To securely authenticate against SharePoint Online or OneDrive for Business and submit content to Records365, a number of prerequisites are required:
- User Credentials that have access to the relevant location in SharePoint Online and OneDrive for Business. Click here to gain access to OneDrive.
- User Credentials for Records365. These may not be the same credentials. See how to Add Users to Records365.
- Azure AD Native Application Registration to delegate authentication to Records365 to the Content Registration script. Global admin permission.
Registering an Azure AD Native App (one time job):
- Sign in to the Azure portal.
- If your account gives you access to more than one, click your account in the top right corner, and set your portal session to the desired Azure AD tenant.
- Search for App Registrations, and then click New registration.
- On the Register an application page, enter the following information and click Register:
- Name: Content Registration for Records365.
- Supported account types: Select “Accounts in any organizational directory (Any Azure AD directory - Multitenant)”.
- Redirect URI:
- Select “Public client/native (mobile & desktop)”
- Enter: https://login.microsoftonline.com/common/oauth2/nativeclient

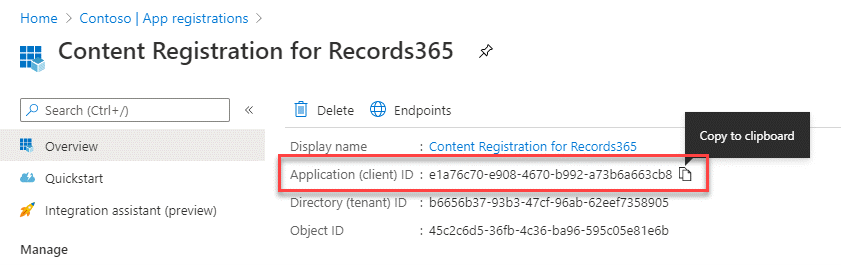
- You will be taken to the application’s main registration page.
- Make a note of the Application (client) ID value. This will be required to run the Content Registration script.
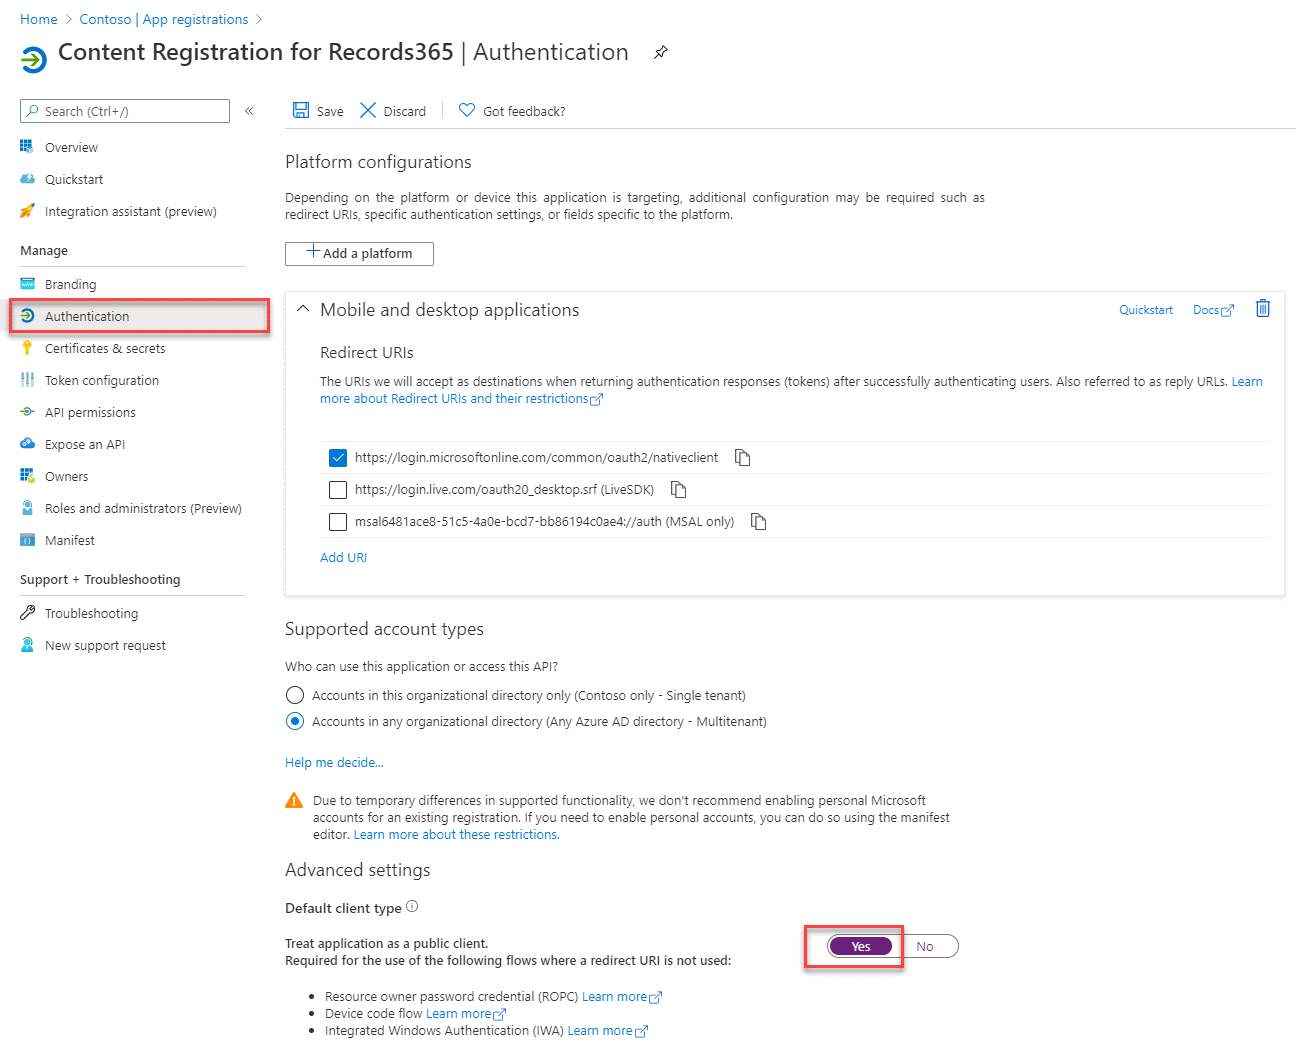
- Click on Authentication on the sidebar:
- Select “Yes” for the “Treat application as a public client” option
- Click “Save” at the top
- Click on API permissions on the sidebar:
- Click Add a permission.
- Click the APIs my organization uses tab.
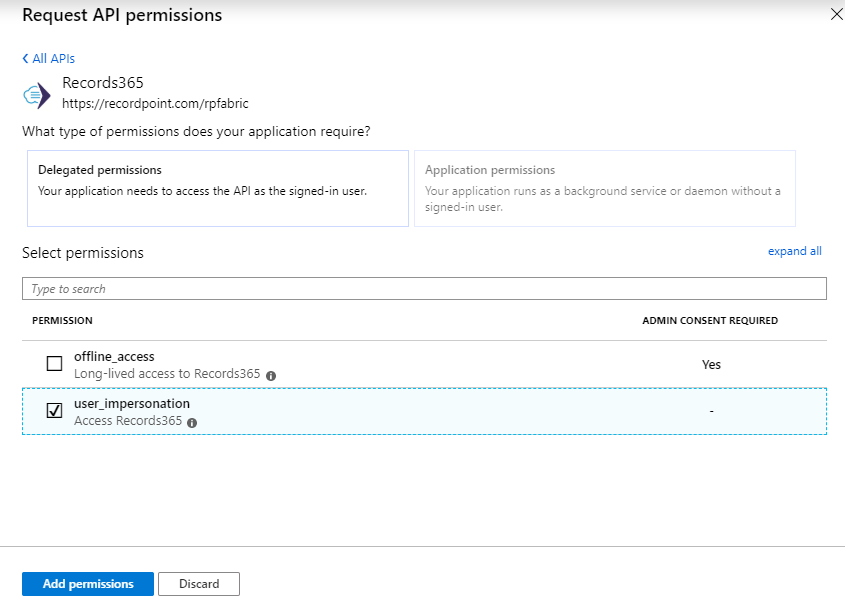
- Search for ‘Records365’ and click on it.
- Select user_impersonation (Access Records365) under Permissions.
- Click Add permissions.
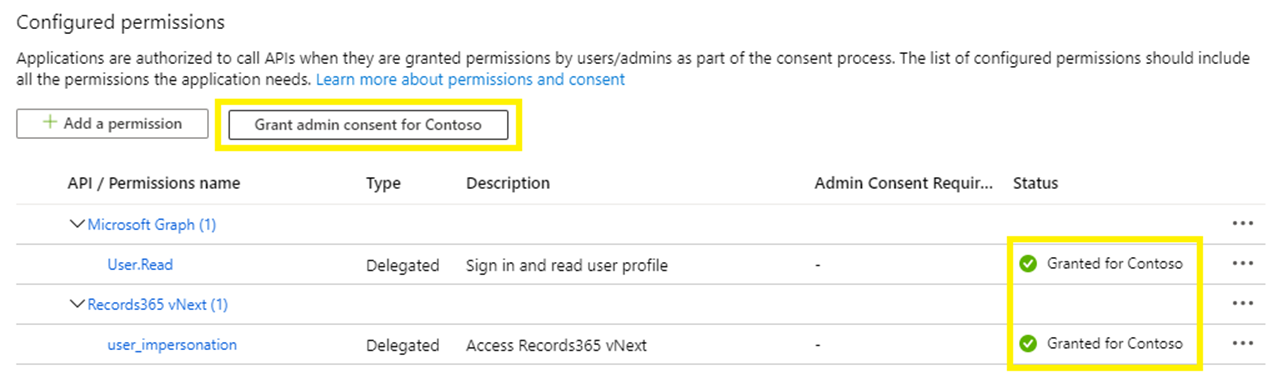
- Grant Admin Consent for the recently added permission
Running the Content Registration script (run for every user or multi users at the same time):
- Call me script file is under Sam’s OneDrive - \Office\Records365 Scripts\Ingest existing files before Connector enabled.
- Please note that call me script has to be in the same folder with other script file and bin folder.
- For the call me script – there are a few customizations:
- Line 21 - [String]$contextType = "Site"
- Line 40-$siteUrls = @('https://unitedchurch-my.sharepoint.com/personal/nsanders_united-church_ca/','https://unitedchurch-my.sharepoint.com/personal/rbott_united-church_ca/') – for multiusers in once
- Line 64 - $params['ServiceUrl'] = 'https://management-cac.records365.ca/'
- Line 66 - $params['Tenant'] = 'united-church.ca'
- Line 67 - $params['ClientId'] = '6b87d579-a1e9-423b-b299-6bb65116ec7e'
- For the call me script – there are a few customizations:
- Run the call me script from PowerShell ISE with Admin permission.
Comments
0 comments
Please sign in to leave a comment.